
There is something about a simple porch sign that makes a home feel instantly lived-in. Like you have a mug of coffee waiting, a candle flickering inside, and a muddy pair of boots by the door because real life happens here.
This rustic pallet wood welcome sign is one of my favorite upcycles because it is forgiving, budget-friendly, and full of texture. We are going to take a humble pallet, turn it into a sturdy sign board, then add a clean, readable “Welcome” with a stencil, and finish it with a weather-ready seal so it can handle real porch life.

Before you start: choosing a safe pallet
Not every pallet belongs in your home. Since this is decor that may sit near a front door where kids and pets roam, it is worth being picky.
One important note: pallet stamps tell you how the wood was treated for pests, not what the pallet may have carried afterward. Even an HT pallet can be contaminated if it was used for chemicals and stored poorly. If you cannot trust the source, skip it.
How to read pallet stamps
- Look for “HT” (heat treated). This is the preferred choice for DIY projects.
- Avoid “MB” (methyl bromide). Those are chemically fumigated and not something I use for home projects.
- Skip pallets with spills, oily stains, or a strong chemical smell, even if they are stamped HT.
- Choose solid boards with minimal cracking and not too many missing chunks. Character is great, splinters and rot are not.
Quick safety setup
Pallets love hiding nails and grit, so this is a gloves and eye protection project. If you will be sanding or cutting, wear a dust mask. A little prep makes the whole build calmer.
Tools and materials
You can keep this very simple. I will list my “ideal” supplies, plus a couple easy swaps if you are working with what you already own.
Tools
- Pry bar (a flat bar works best) and a hammer
- Nail puller or locking pliers
- Drill/driver
- Measuring tape and pencil
- Miter saw or circular saw (optional, but helpful for clean edges)
- Orbital sander or sanding block
- Paint brush or foam brush
- Stencil brush or small sponge dauber
Materials
- 1 heat-treated pallet
- 1x2 lumber for a back brace (optional but recommended)
- Wood screws (often 1 1/4 inch works well, but choose a length based on your slat thickness so the screws bite into the brace without poking through the front)
- Wood glue (optional, extra strength)
- Sandpaper (80, 120, 220 grit)
- Stain or paint (your choice)
- Stencil (store-bought or DIY)
- Acrylic craft paint for lettering
- Exterior-rated clear coat (spar or marine varnish, or an exterior polyurethane) in your preferred sheen
- D-ring hangers or sawtooth hanger, or twine for hanging
My favorite budget swap: If you do not have 1x2 lumber, you can use two extra pallet slats as back braces instead.
Step 1: dismantle the pallet safely
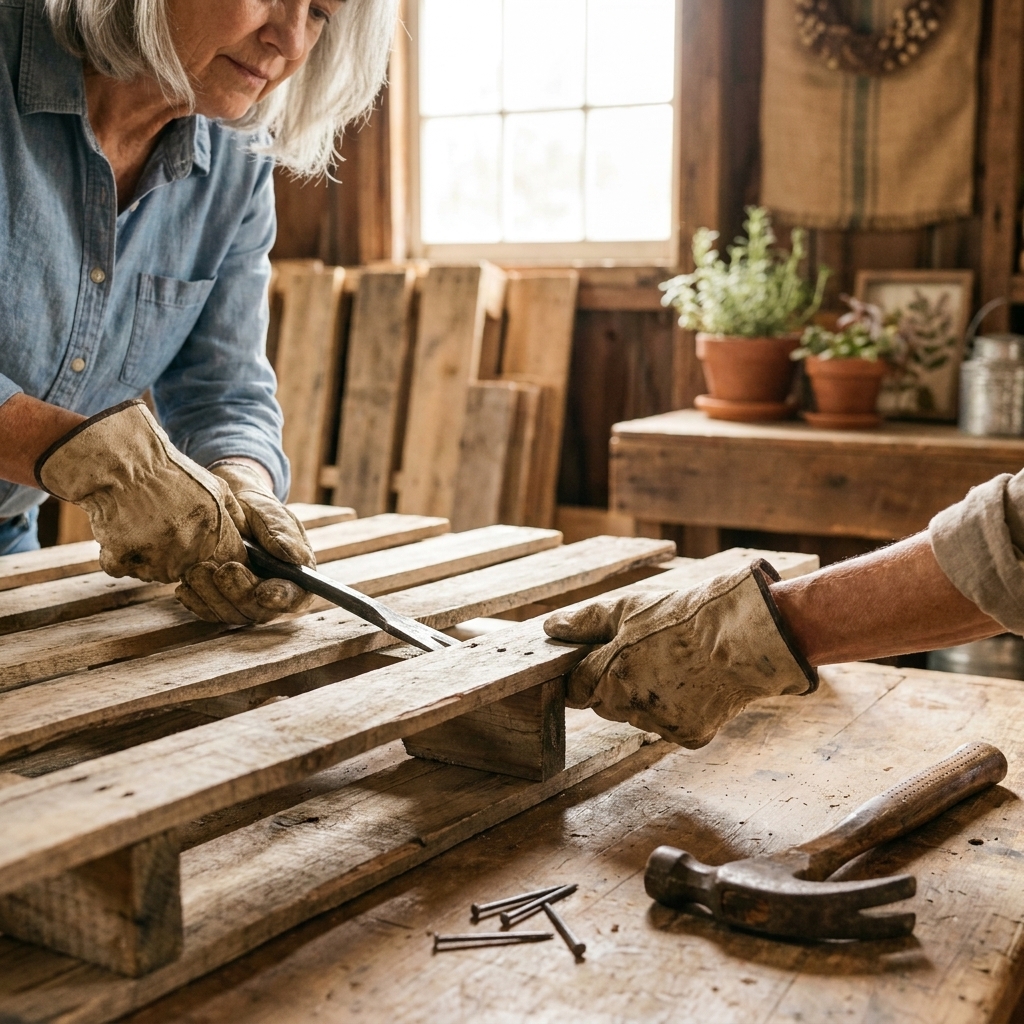
This is the step that can feel intimidating, but it is mostly about patience. Pallet boards split when we rush them.
My low-splinter method
- Start at one end. Slide your pry bar between the slat and the stringer (the thicker support board underneath).
- Lift gently. Rock the bar up just enough to loosen, not rip.
- Work both sides of each nail. Move a few inches, pry again, then switch to the other side of the same board. This keeps the pressure even.
- Remove boards one by one. If a board starts to crack, stop and pry closer to the nail.
- Pull nails immediately. Use a nail puller or locking pliers. Set nails in a container so they do not end up in your driveway or shoe.
Step 2: plan your sign size
For a classic porch-leaner look, I love a sign around 9 to 12 inches wide and 30 to 42 inches tall. But you can absolutely scale this to your space.
Two easy design options
- Vertical porch sign: Great for leaning by the door, next to a bench, or near a plant stand.
- Horizontal door sign: Shorter and wider, easy to hang above a shoe bench or on a covered porch wall.
Lay your pallet boards on the floor or a work table and audition the order. I like to mix boards with different grain and knots so it feels collected over time, not factory perfect.
Step 3: cut and assemble
Once you have the boards you want, trim them to length so the top and bottom edges are even.
Assembly steps
- Cut boards to length. Use a miter saw for the easiest straight cuts, or a circular saw with a guide.
- Arrange boards face down. Keep the prettiest side facing the table so you are building on the back.
- Add back braces. Place one brace near the top and one near the bottom (about 4 to 6 inches in). For a taller sign, add a third brace in the middle.
- Pre-drill. Pallet wood splits easily, so drill pilot holes.
- Screw the boards to the braces. Two screws per board on each brace is plenty.
Optional: Add a thin line of wood glue where each board meets the brace for extra stability, especially if the sign will live outdoors.

Step 4: sand it smooth
This is where pallet wood goes from “splintery barn stack” to “cozy rustic.” You do not need to sand away every dent and saw mark. Those are part of the charm. You just want it smooth enough to handle.
My sanding routine
- 80 grit: Quick pass to knock down rough edges and any stamp ink you do not want showing. (Try not to over-sand and thin out your slats.)
- 120 grit: Smooth the surface so your stencil sits flat.
- 220 grit: Light finish sanding, especially on corners and edges where hands may touch.
After sanding, wipe the whole sign with a damp cloth or a tack cloth to remove dust. Stain and paint do not like dust.
Step 5: stain or paint
There is no wrong choice here, just the look you want. I tend to reach for warm stains that let the grain peek through, then use crisp paint for the lettering.
Farmhouse-favorite finishes
- Warm walnut stain: Rich, classic, and makes black or cream lettering pop.
- Weathered gray wash: Soft and coastal-farmhouse, pretty with charcoal lettering.
- Antique white paint: Bright and welcoming, great if your porch is shady.
- Charcoal paint: Moody, modern farmhouse, especially with white lettering.
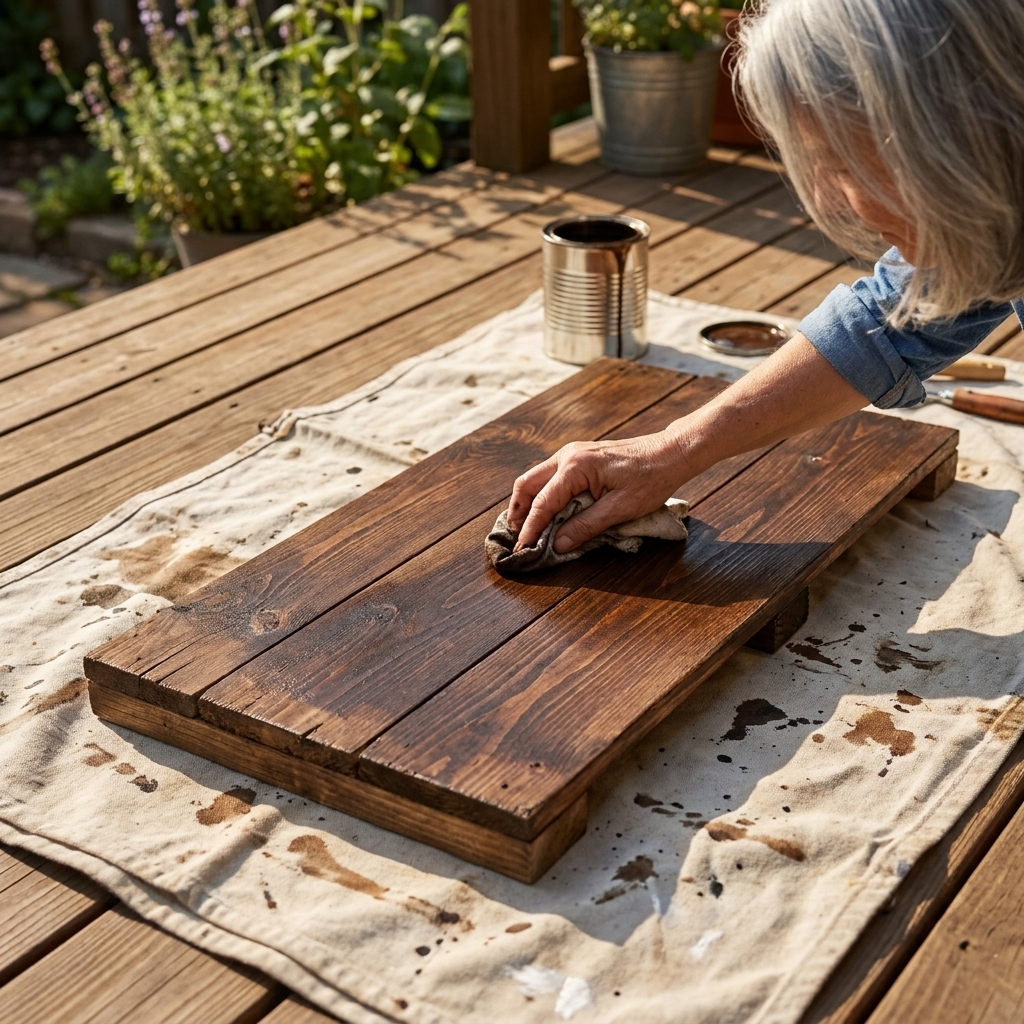
Tip: If you are staining, apply with a rag or brush and wipe back the excess after a few minutes. Pallet wood can absorb stain unevenly, which I actually love, but wiping helps keep it from going too blotchy.
Let your stain or paint dry fully before you stencil. Dry time depends on the product and humidity, so follow the label, but I typically plan for at least overnight after stain so I am not trapping moisture under paint.
Step 6: stencil the words
This is the part that makes it feel finished. Stenciling looks fancy, but it is really just slow, steady layers.
How to get clean edges
- Center your stencil. Measure the width of your sign, then mark a faint center line with pencil.
- Tape it down well. Use painter’s tape on all sides so it does not shift.
- Use very little paint. Dip your stencil brush, then dab most of it off on a paper towel. Dry brush is your best friend.
- Pounce, do not sweep. Tap straight up and down. Sweeping pushes paint under the stencil.
- Build light coats. Two to four light layers look cleaner than one heavy coat.
- Peel carefully. Remove stencil while the paint is still slightly wet for crisp lines.
If you do not have a stencil: You can print letters, cut them from cardstock, and use them as one-time stencils. It is a little fiddly, but it works on a budget.
Let the lettering dry before distressing or sealing. Again, check your paint label, but a couple of hours is usually enough to handle gently. If you can still dent it with a fingernail, give it more time.

Step 7: distress it (optional)
If you want that timeworn, flea-market feel, distressing is a quick final touch.
Two easy options
- Light sanding: Once the lettering is dry, lightly sand edges and a few high spots with 220 grit to let the wood show through.
- Dry brushing: Dip a nearly dry brush into a slightly darker paint and skim it over the surface for soft age and depth.
Go slowly. You can always add more wear, but it is hard to un-wear something once you have sanded through.
Step 8: seal for outdoors
If your sign will sit on a covered porch, it still needs protection from humidity, temperature swings, and the occasional sideways rain. And if your porch gets sun, a clear coat is your best defense against fading and scuffs.
Best clear coats
- Spar or marine varnish: My top pick for outdoor wood projects because it is designed to flex with weather changes.
- Exterior-rated polyurethane: Durable and easy to find. Just make sure it is truly rated for exterior use, not an interior poly wearing an optimistic label.
- Clear matte exterior topcoat: If you want less shine, choose matte and confirm it is rated for exterior use.
Apply thin coats and let them dry fully between coats. I typically do 2 to 3 coats, especially if the sign will sit where it gets morning sun.
Seal both sides: Coat the front, edges, and the back. Sealing both sides helps the wood expand and contract more evenly and can reduce warping.
Real porch life note: Even exterior clear coats last longer on a covered porch. If your sign gets a lot of sun or wind-driven rain, expect to refresh the topcoat occasionally. Some finishes can amber or yellow over time, especially in UV light.
Important: If you used craft paint for lettering, sealing is what keeps it from scuffing or peeling over time.
Step 9: hang or style it
You have a few options depending on your front door setup and whether you want to drill into anything.
Hanging methods
- D-ring hangers: Sturdy and sits flatter against the wall.
- Sawtooth hanger: Works for lighter, smaller signs.
- Twine or rope: Sweet and rustic, best for signs that are sheltered from strong wind.
My favorite styling formula
Lean the sign beside a simple planter and add one more layer like a small crate, a lantern, or an old crock with clipped branches. The goal is height plus texture, not clutter.

Troubleshooting
My pallet boards split
It happens. Use those cracked boards for shorter braces, or cut around the split for smaller projects later. For the sign face, choose the boards that stayed intact.
My stencil bled
Let it dry, then clean up with a tiny artist brush and your background color. Next time, use less paint and pounce lightly in layers.
The sign is warping
Add a third brace across the back, and make sure you sealed both the front and back of the sign. Sealing both sides helps it expand and contract more evenly.
The wood feels too rough
After the first coat dries, lightly sand with 220 grit and add a second coat. That quick sand makes it feel smoother without losing character.
Easy variations
- Add a seasonal mini wreath: Screw a small cup hook near the top for swapping greenery.
- House number version: Stencil your number instead of “Welcome” for a functional touch.
- Two-tone frame: Add 1x2 trim around the edges and paint it black for a modern farmhouse outline.
- Vertical stripe accent: Tape off a stripe down one side and paint it a contrasting color before stenciling.
FAQ
How long does this take?
If your pallet comes apart nicely, you can build and stencil the sign in an afternoon. Dry times for stain, paint, and sealer usually make it a weekend project, and some finishes take a few days to fully cure. When in doubt, follow the product label and give it more time than you think you need.
Can I make this without power tools?
Yes, especially if you keep the original board lengths and do a smaller sign. You can use a hand saw and a screwdriver. Pre-drilling is still helpful, even with a simple hand drill.
What is the best paint for the lettering?
Outdoor craft acrylic can work if you seal it well. For maximum durability, use exterior-grade paint for the lettering, especially if the sign will get sun or damp air.
Should I worry about bugs in pallet wood?
Inspect closely either way. Heat-treated pallets are preferred, but they are not a magic shield if a pallet has been stored in damp conditions for a long time. Avoid pallets that have been sitting in tall grass, feel damp, or show obvious insect damage.
If you make your own pallet welcome sign, I hope you let it be a little imperfect in the best way. Let the knots show. Let the grain do its thing. That is the whole point of rustic, after all. It is not about perfect lines. It is about a warm hello at the door.