There is something about wood paneling in a bathroom that instantly makes the whole space feel cared for. It is cozy, a little nostalgic, and it gives you that farmhouse “this house has a story” feeling even if your vanity is from a big box store and your mirror is a flea market rescue.
But if you have been stuck between shiplap and beadboard, you are not alone. They can look similar in photos, yet they behave differently on the wall, hit your budget differently, and set a slightly different mood.
Let’s walk through the real-life differences so you can choose the paneling that fits your bathroom, your skill level, and your style.
The quick difference
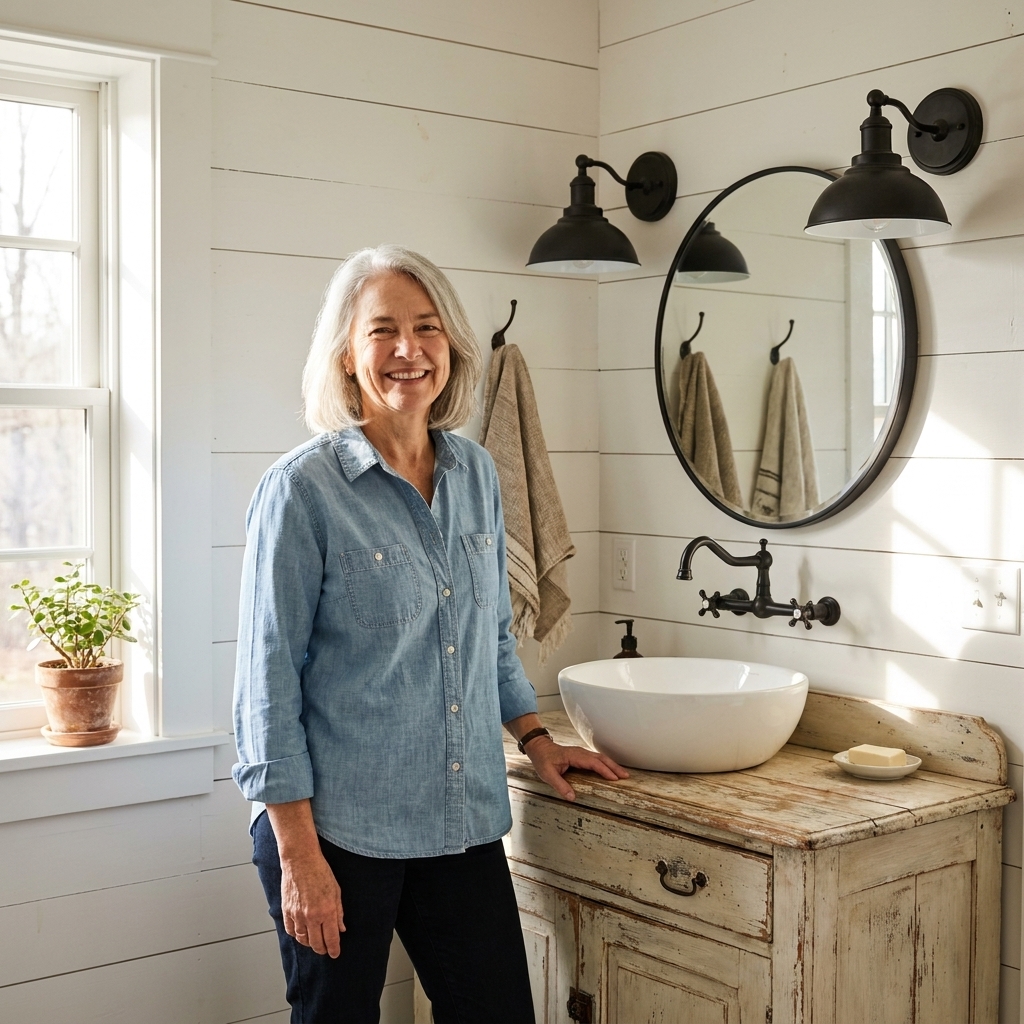
Shiplap is a board profile with rabbeted edges that overlap to create clean, shadowed lines. It is typically installed horizontally, but it can be installed vertically if you want a different look.
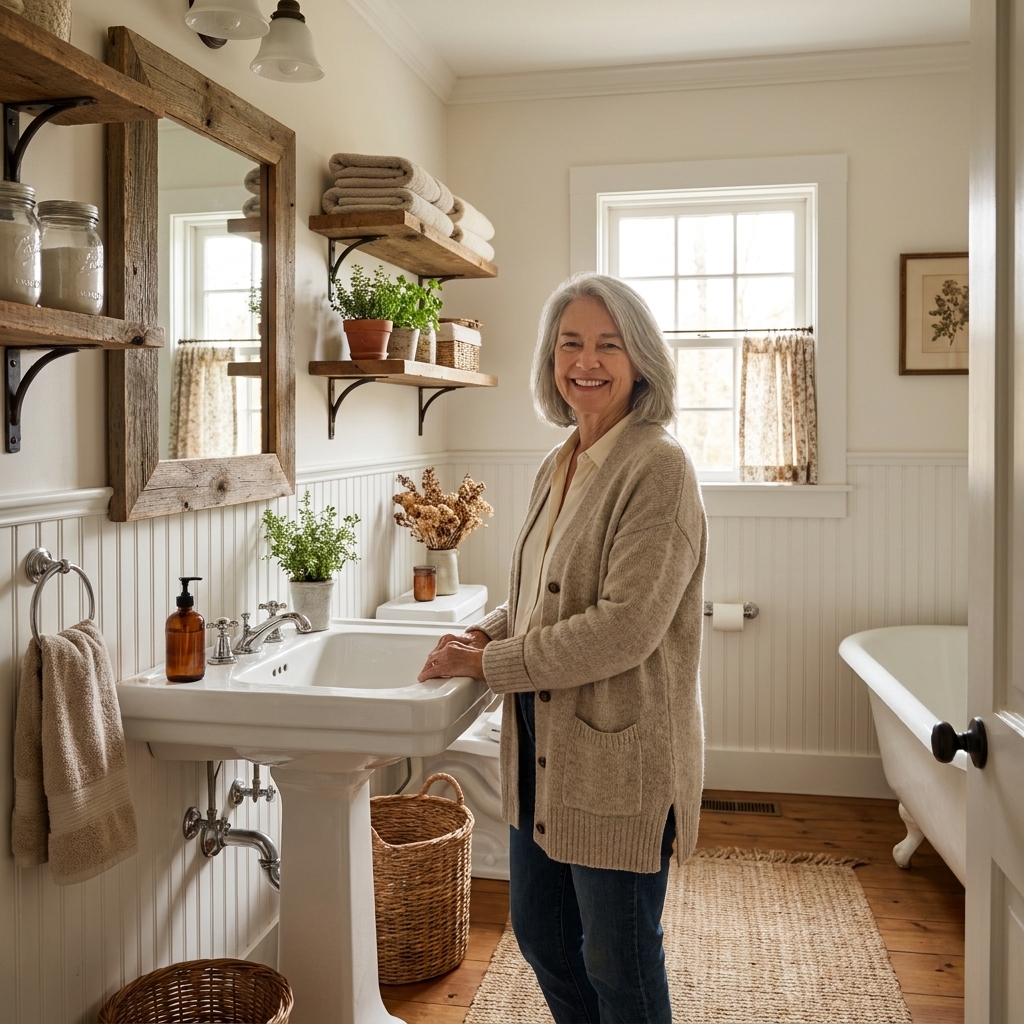
Beadboard is defined by its narrow vertical grooves (the “beads”) that create a classic, cottage-style texture. It is traditionally used as wainscoting, but it can absolutely go full height for a vintage farmhouse feel.
- Shiplap: wider lines, often reads modern farmhouse and rustic cabin
- Beadboard: finer vertical texture, often reads cottage farmhouse and classic charm
Aesthetic impact
Shiplap: relaxed, tailored, and a bit bold
Shiplap brings structure. Those horizontal planks can visually widen a small bathroom and make the room feel more grounded. In my experience, shiplap is best when you want the walls to be a design feature, not just a background.
- Best for: modern farmhouse bathrooms, rustic-luxe spaces, simple finishes, black hardware, concrete or honed stone counters
- Looks especially good with: chunky wood mirrors, schoolhouse lights, vintage-inspired faucets, linen shower curtains
Beadboard: soft, classic, and quietly charming
Beadboard feels like an old house in the best way. It adds texture without demanding attention. The vertical lines can make ceilings feel a touch taller, which is a nice little trick in bathrooms that feel tight.
- Best for: cottage farmhouse, vintage farmhouse, traditional homes, simple powder rooms
- Looks especially good with: pedestal sinks, vintage brass or pewter finishes, floral or ticking stripe wallpaper above, painted furniture-style vanities
Cost
Costs vary wildly by material choice, your region, and whether you are paneling one accent wall or wrapping the whole room. But here is the honest rundown of what typically moves the needle.
Shiplap cost factors
- Real wood shiplap boards: often the priciest route, but gorgeous and durable when properly sealed and painted.
- Plywood “faux shiplap” strips: a popular budget DIY. You rip plywood into planks. It can look fantastic, but edges need priming and sealing so they do not fuzz or swell in humidity.
- MDF shiplap: often affordable and very smooth, but it is not my first pick for bathrooms unless humidity is well controlled and seams are carefully sealed.
Beadboard cost factors
- Beadboard panels (4x8 sheets): usually the most budget-friendly and fast. Great for wainscoting and full walls, but you have to plan seams.
- Individual beadboard planks: more expensive than panels, but tend to look higher-end and make seams easier to hide.
- Pre-primed options: can cost more upfront, but save time and give a smoother finish.
My budget tip: If you are going for wainscoting only, beadboard panels can be a fantastic value. If you want full-height drama and fewer visible seams, shiplap planks (or well-finished plywood planks) often look more intentionally “designed.”
Installation difficulty
I am all for a weekend project, but I also believe in choosing the project that will not drain the joy right out of you halfway through Sunday afternoon.
Shiplap installation: moderate, with a few fussy steps
Shiplap is straightforward, but it is not “mindless.” You are stacking boards, keeping lines level, and working around plumbing and outlets.
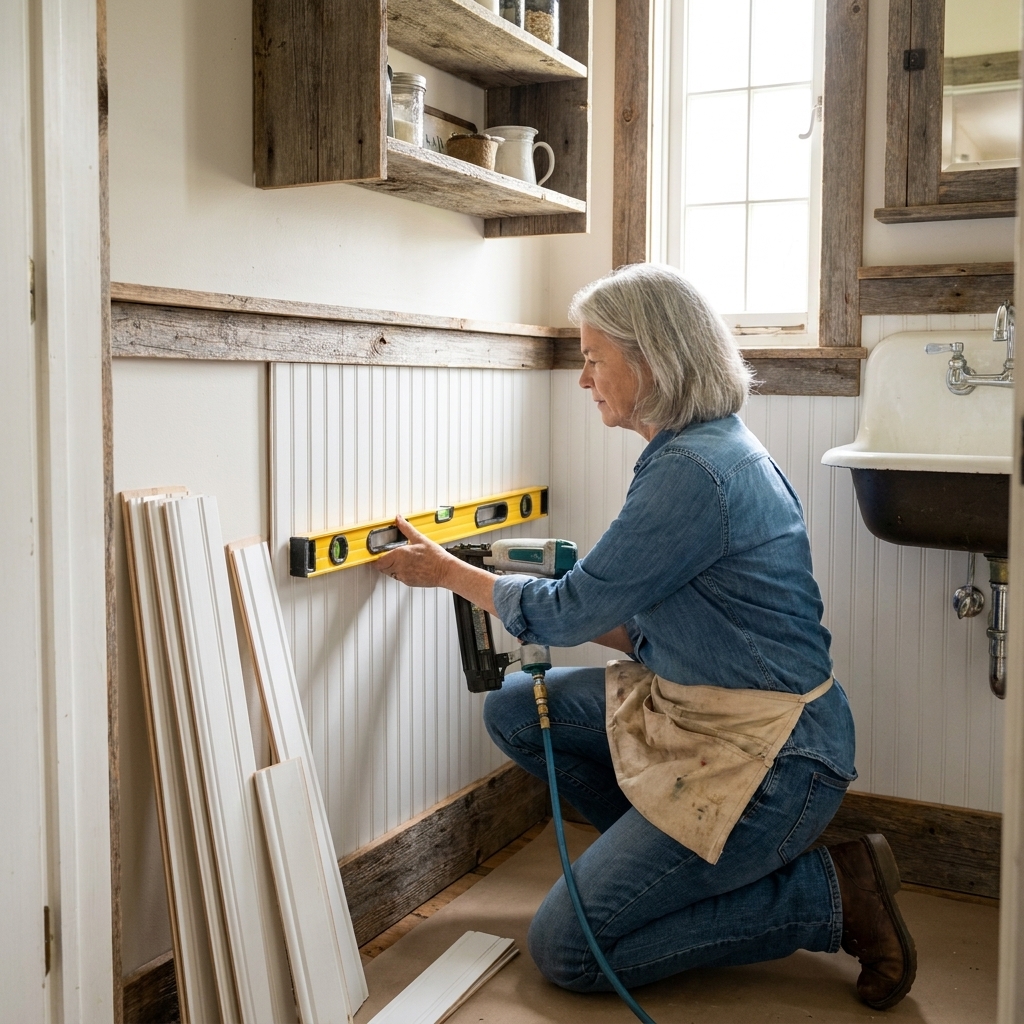
- Tools you will likely want: stud finder, level or laser level, brad nailer, miter saw, jigsaw or multi-tool for cutouts
- Common challenge: keeping your rows perfectly level so you do not drift as you go
- Pro-looking detail: intentional gaps (if your shiplap needs a reveal) plus careful caulking at corners
One detail people skip: wood moves. Follow the manufacturer guidance on spacing, and leave a small expansion gap where boards meet trim or tight corners. A tiny gap is much easier to live with than a buckle later.
Beadboard installation: easiest as panels, moderate as planks
If you use beadboard sheets, you can cover a lot of wall quickly. For wainscoting, beadboard is often the simplest path because the top rail trim hides the top edge and visually “finishes” the installation.
- Fastest option: beadboard panels plus a top cap (chair rail or simple ledge)
- Common challenge: hiding panel seams and keeping the pattern aligned
- Pro-looking detail: add a baseboard and top rail that feel substantial, not skimpy
Fastening note: Many beadboard installs use a mix of brad nails and construction adhesive. Follow the panel or plank manufacturer instructions, and do not rely on studs alone to hold every edge flat.
Typical wainscoting height: 36 to 42 inches is common, or about one-third of the wall height. Higher can be beautiful too, especially in a powder room, but it helps to choose the height first so your trim and mirror placement feel intentional.
Bathrooms and moisture
This is the part most people skip until something starts swelling at a seam. Bathrooms are humid. Even with a good fan, you are dealing with steam, splashes, and regular temperature changes.
Material matters more than the pattern
Both shiplap and beadboard can do well in bathrooms if you choose smart materials and finish them properly.
- Best choices for humid bathrooms: real wood (properly primed and painted), PVC or vinyl beadboard in high-splash zones, or moisture-rated products
- Use caution: MDF in bathrooms, especially near tubs and sinks or in homes with weak ventilation
Finish and prep that make the difference
- Prime everything: including cut ends and the backs of boards if possible.
- Seal seams thoughtfully: a neat bead of paintable caulk at corners and trim joints helps keep water from sneaking in.
- Choose the right paint sheen: satin or semi-gloss is easier to wipe down than flat, and it stands up better to moisture.
- Do not skip the fan: the best paneling in the world cannot compete with daily steam and no ventilation.
My rule of thumb: In a powder room, you can choose based mostly on style. In a full bath with daily showers, choose based on ventilation and finish quality, then style.
Cleaning and maintenance
Shiplap
Those horizontal grooves can collect dust, especially behind the toilet or near towel racks. It is not difficult to clean, but you will notice it if you are the kind of person who sees every little cobweb.
- Easiest upkeep: semi-gloss paint, tight caulk lines, and a quick wipe-down routine
Beadboard
Beadboard has more frequent grooves, but they are usually shallower. In a busy family bath, beadboard wainscoting is forgiving because it hides scuffs and splashes better than flat drywall.
- Easiest upkeep: wainscoting-height beadboard with durable trim and satin or semi-gloss paint
Best placements
Best ways to use shiplap
- Accent wall behind the vanity: a simple way to add texture without paneling the whole room.
- Half wall plus paint above: keeps things airy and cuts material cost.
- Ceiling treatment: shiplap on a bathroom ceiling is a showstopper, especially with a vintage-style light fixture.
Best ways to use beadboard
- Classic wainscoting: beadboard plus a chunky top rail feels instantly farmhouse.
- Full-height in a small powder room: cozy, charming, and makes the room feel finished.
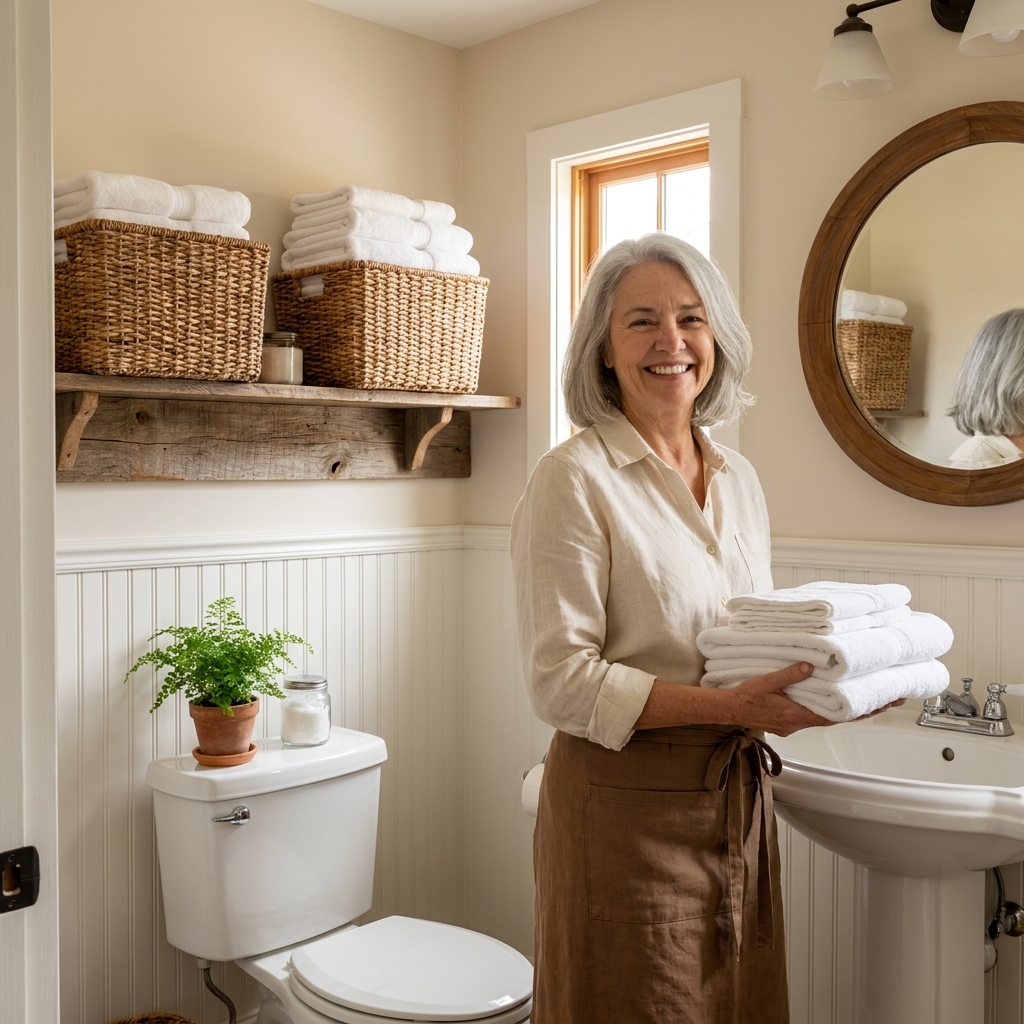
- Behind open shelving: adds texture without competing with towels and baskets.
Trim and transitions
The difference between “DIY weekend project” and “this looks custom” is often the trim plan.
- Inside corners: a clean caulk line can be enough, but corner trim (like a simple square or lattice piece) can hide wavy walls and make seams look crisp.
- Outside corners: plan for corner trim or a wood corner board so the edges do not look raw and do not take a beating from elbows and laundry baskets.
- Top edge of wainscoting: a substantial cap or chair rail makes beadboard feel finished, and it can protect the wall from splashes.
- Around a backsplash: decide if the paneling stops at the backsplash height or runs behind the mirror. Either can work, but it looks best when that line is intentional and repeated elsewhere (like matching the top rail height).
Choosing the right one
If you are still torn, here are the questions I would ask if we were standing in your bathroom with a tape measure and a cup of coffee.
Pick shiplap if you want:
- A bolder architectural look that feels modern farmhouse
- Horizontal lines that visually widen the room
- A feature wall moment behind the vanity or tub
- The option to stain (less common in bathrooms, but beautiful in the right space)
Pick beadboard if you want:
- Classic cottage-farmhouse charm that feels timeless
- A traditional wainscoting look with trim details
- A budget-friendly, fast install using panels
- A softer texture that plays nicely with wallpaper, vintage art, and collected decor
If your bathroom is tiny
Both can work, but I often lean beadboard wainscoting in truly small baths because it adds texture without making every wall line the main character. If you love shiplap, consider using it on one wall only.
If your bathroom has low ceilings
Beadboard (vertical lines) can subtly help the room feel taller. If you choose shiplap, keep the color light and the styling simple so the room does not feel visually “stacked.”
Farmhouse styling tips
- Use thicker trim than you think you need: especially on beadboard wainscoting. Substantial baseboards and a solid top rail read custom.
- Repeat warm wood tones: a little wood goes a long way. Try a reclaimed mirror frame, a walnut shelf, or an oak stool.
- Choose aged metals: oil-rubbed bronze, pewter, unlacquered brass, or matte black all play beautifully with rustic paneling.
- Layer in textiles: a nubby bath mat, a linen shower curtain, and soft towels instantly balance the “hard” surfaces.
- Keep whites interesting: creamy whites and warm off-whites look especially inviting with wood texture. Bright cool white can feel stark in a farmhouse space.
FAQ
Can I put shiplap in a shower area?
I would not use real wood shiplap inside a shower surround. For a shower zone, stick with tile or a waterproof wall system. If you love the look, you can mimic shiplap with tile or waterproof panels designed for wet areas.
Is beadboard outdated?
Not in a farmhouse or cottage-style home. Beadboard is one of those classic textures that cycles through trends, but it never really leaves. The key is pairing it with finishes you love, not over-accessorizing the room.
Should the grooves run vertical or horizontal?
Traditionally, beadboard grooves run vertical. Shiplap boards are typically installed horizontally. You can break the rules, but do it on purpose and keep everything else simple so it reads intentional.
Do I need to remove drywall first?
Usually no. Both shiplap and beadboard can be installed over drywall as long as the wall is sound. Fasten into studs where needed and use adhesive when recommended by the manufacturer. In older homes with uneven walls, furring strips can help create a flatter surface.
My bottom line
If you want clean farmhouse structure and a little more drama, shiplap is your friend. If you want classic cottage texture that installs easily and plays well with vintage details, beadboard is hard to beat.
Either way, the magic is in the finishing: good prep, moisture-smart paint, trim that feels substantial, and a few warm, honest materials that make the room feel lived-in and loved.